Unlocking Echo Dot Part 3: Finding the UART
#echo #dot #amazon #uartSo far, we have discussed background on the Echo Dot V2, and why I am interested in reusing the hardware. We have also reused the amonet exploit to dump the eMMC of the dot.
As a next step, before we dive into the existing bootloader process, it would be useful to see a dump of the boot logs of the echo dot.
With many embedded linux systems, including android devices, a UART is included to provide lowlevel debug information about the boot process. This debug uart is only intended to be used during development, so in recent devices it can be hard to find a dedicated connector on the PCB that shows where the UART is connected. In Amazon Echo V1, there was a dedicated set of landing pads where apparently amazon development hardware can plug in, more information is available here.
As far as I could tell, no one has publicly documented where the uart is on the Echo Dot V2, so I had to find it myself.
In my case, I used a portable oscillocope to probe the testpoints. Finding the serial port proved tricky because the serial port only sends traffic for a couple of seconds when the SoC is first booting. As soon as the boot process finishes the linux kernel turns off the uart debug logging and the messages stop.
One trick I used to find the uart was to load the amonet bootloader exploit, and start a firmware dump of the main user partition. This partition is the largst one in the Echo, and by default the exploit prints out debug messages for each sector that is dumped, and this enabled me to figure out where the UART TX is.
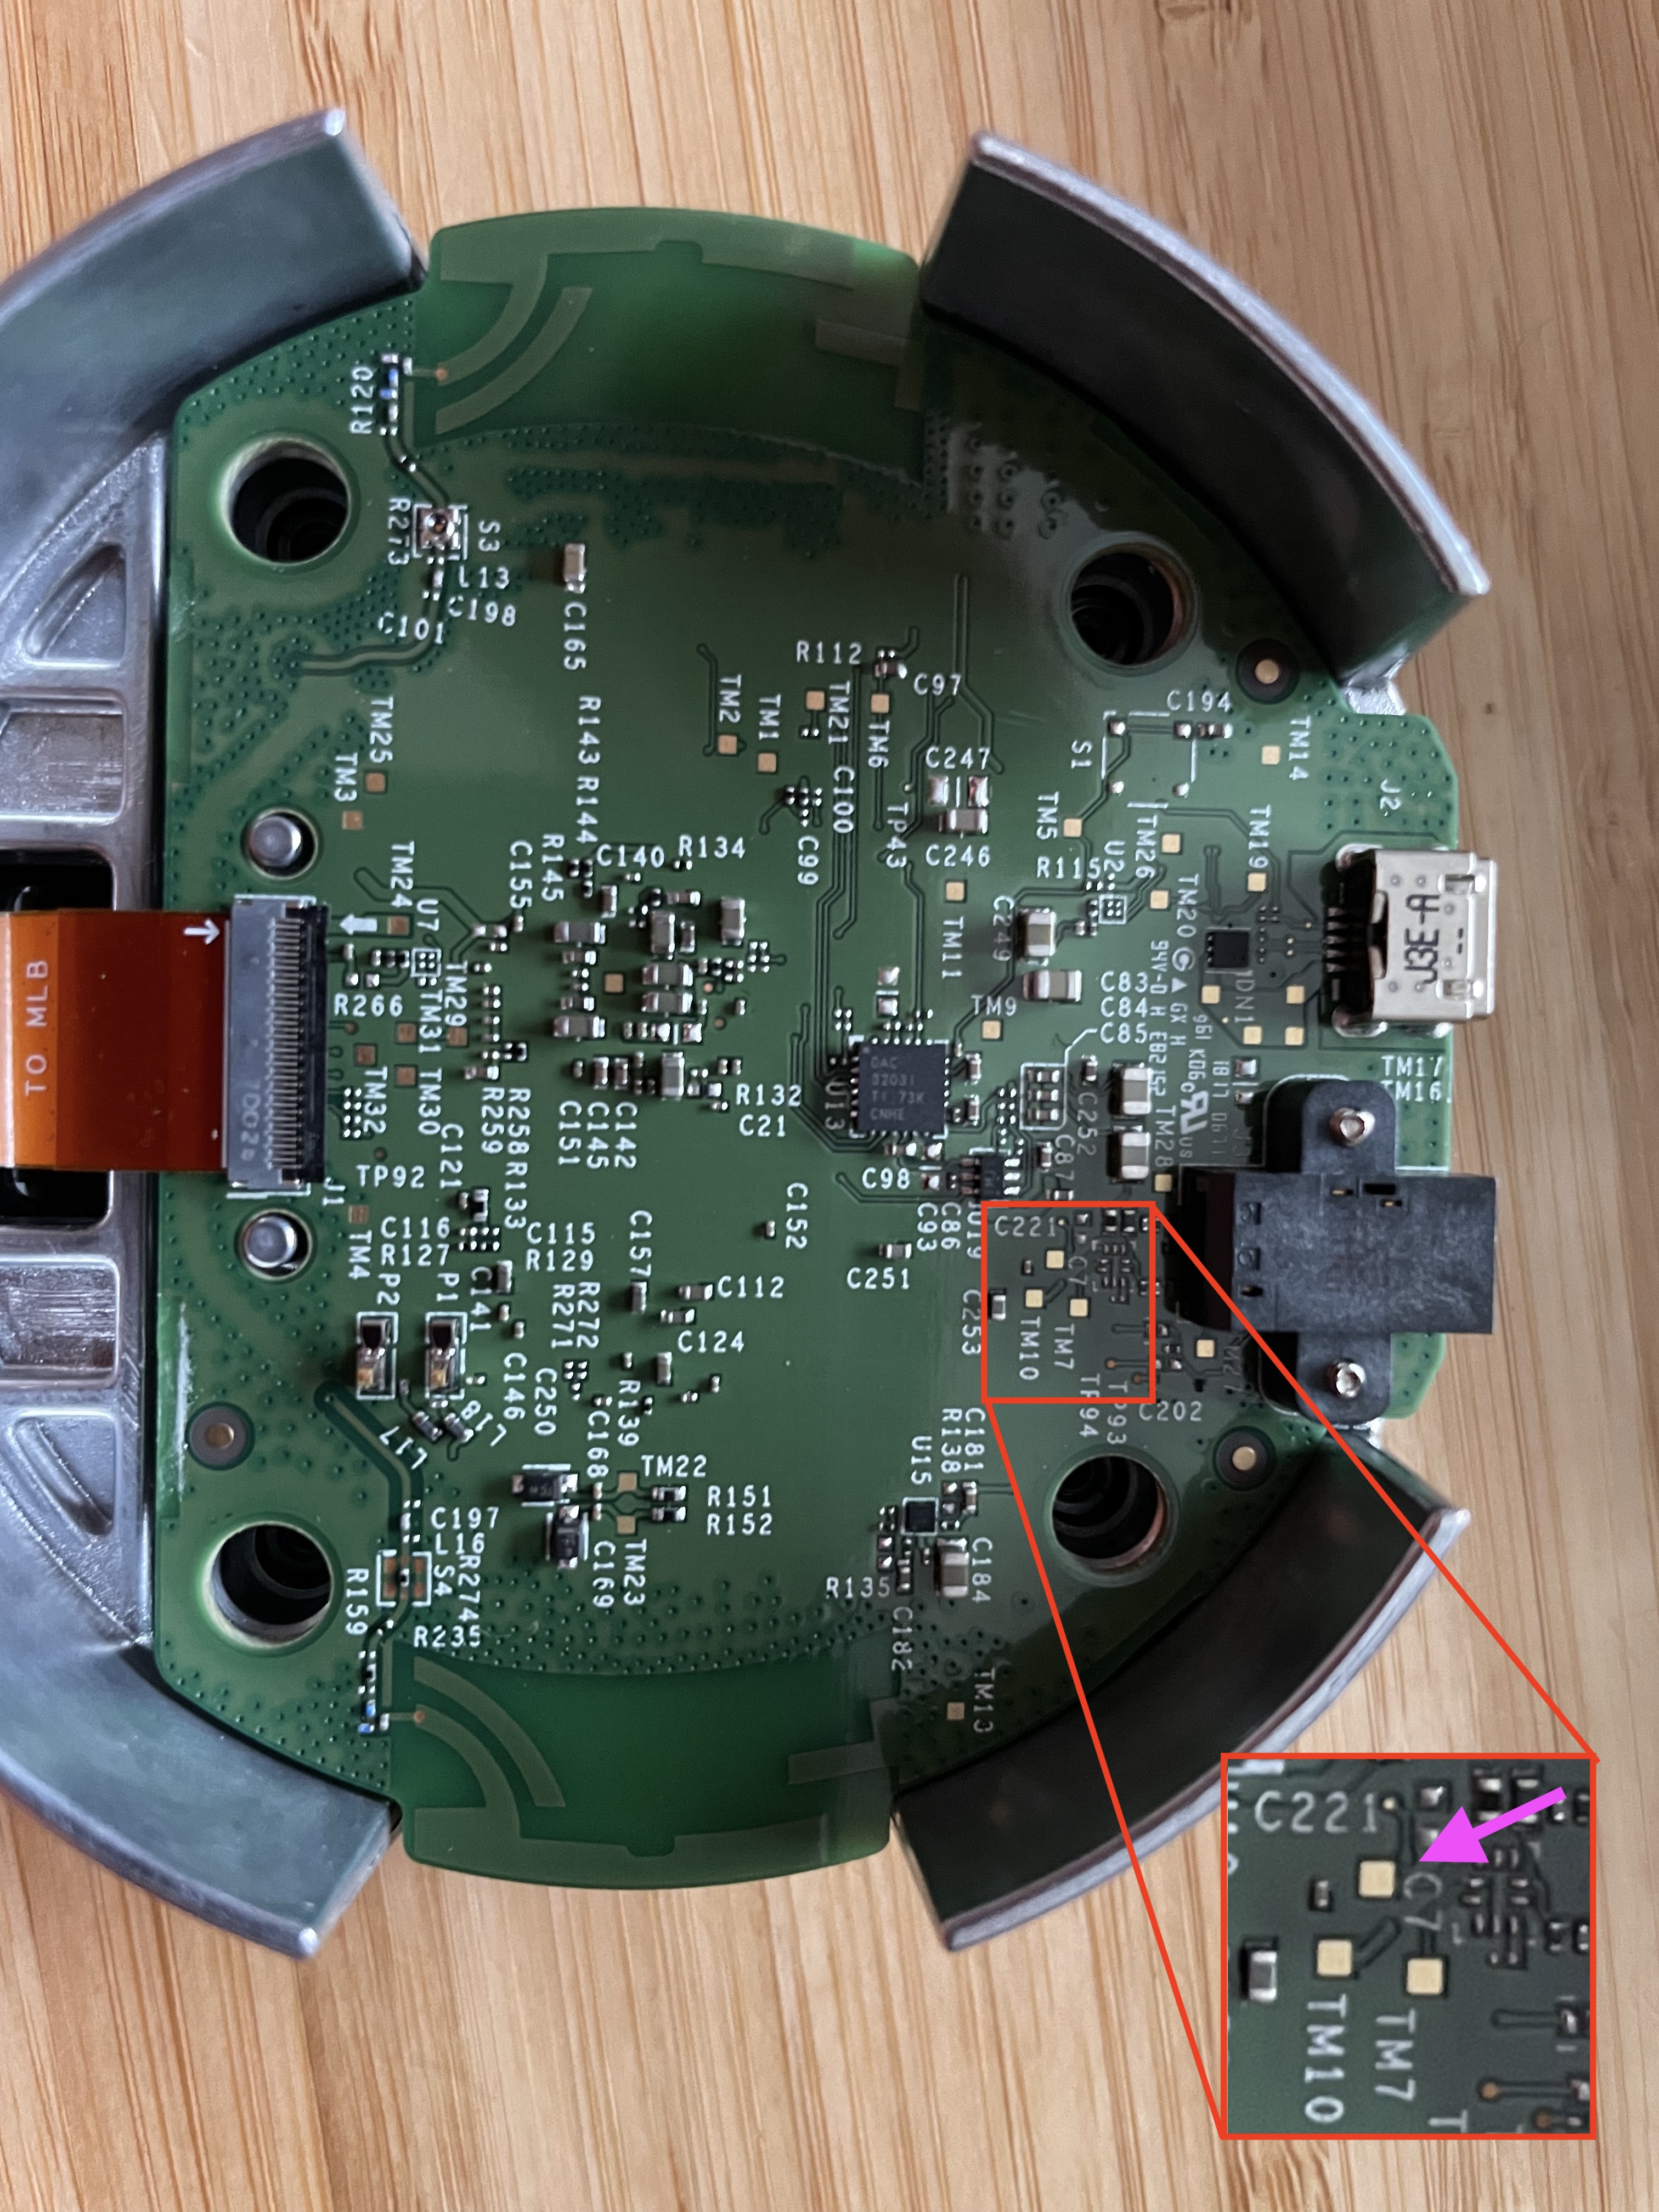
It turns out that the UART TX is located on an apparently unmarked testpoint, near the usb port:
Boot serial port baud rates are the same as other Amazon mediatek products. The BROM prints out some short messages at a baud rate of 115200 8N1, but when the preloader starts it switches the baud rate to 921600. This means if you want to record messages from BROM and the rest of the boot process, the easiest way to do this is to record them during separate boot attempts. You can find below the BROM and the Preloader/LK/linux boot logs from doing a boot of this echo dot.
The BROM text is extremely terse, and it is not immediately apparent what the lines mean. However, the boot log we recorded at the higher baudrate, which includes content from Preloader / Little Kernel, and Linux Kernel boot is much more interesting. Here are some tidbits:
A/B updates
[2116] [BCB] BCB Info: version 1
[2117] [BCB] Part 0 - prio=14 tries=0 success=1
[2117] [BCB] Part 1 - prio=15 tries=0 success=1
[2118] [BCB] BCB active slot = 1
These lines from the preloader seem to show the echo choosing to boot in “active slot 1”. This seems to be a reference to A/B System Updates, which is an Android feature to allow for managing multiple independent operation system images on a device, so that OS updates don’t need to be installed as a separate step, but can be updated in the background while the device is being used. Interestingly, Android A/B updates were only integrated into AOSP in Android version 7.1, but the Echo dot uses Android 5.5. So it seems that Amazon decided to backport A/B updates to an older version of Android for the echo, but their other tablet products, like the Kindle Fire HD, continue to use the traditional Android update process.
And indeed, later in the boot file, we can see the following line:
[PART] load "lk_b" from 0x0000000002000200 (dev) to 0x4BD00000 (mem) [SUCCESS]
So now, lk_b is being chosen to load, which corresponds to “slot 1” refered to above.
This will make the exploit interesting because we need to force the preloader to load the correct little kernel that we calculated offsets for. Different echos might have different slots that have the latest software.
Boot Reason
[2930] lk boot reason = power_key
Like other Android Bootloader chains, it seems like different boot reasons can be triggered. Traditionally, holding volume down while booting up should trigger fastboot mode for the little kernel, and it would be good to check that the echo dot performs the same way.
Getting Easier Access to the UART
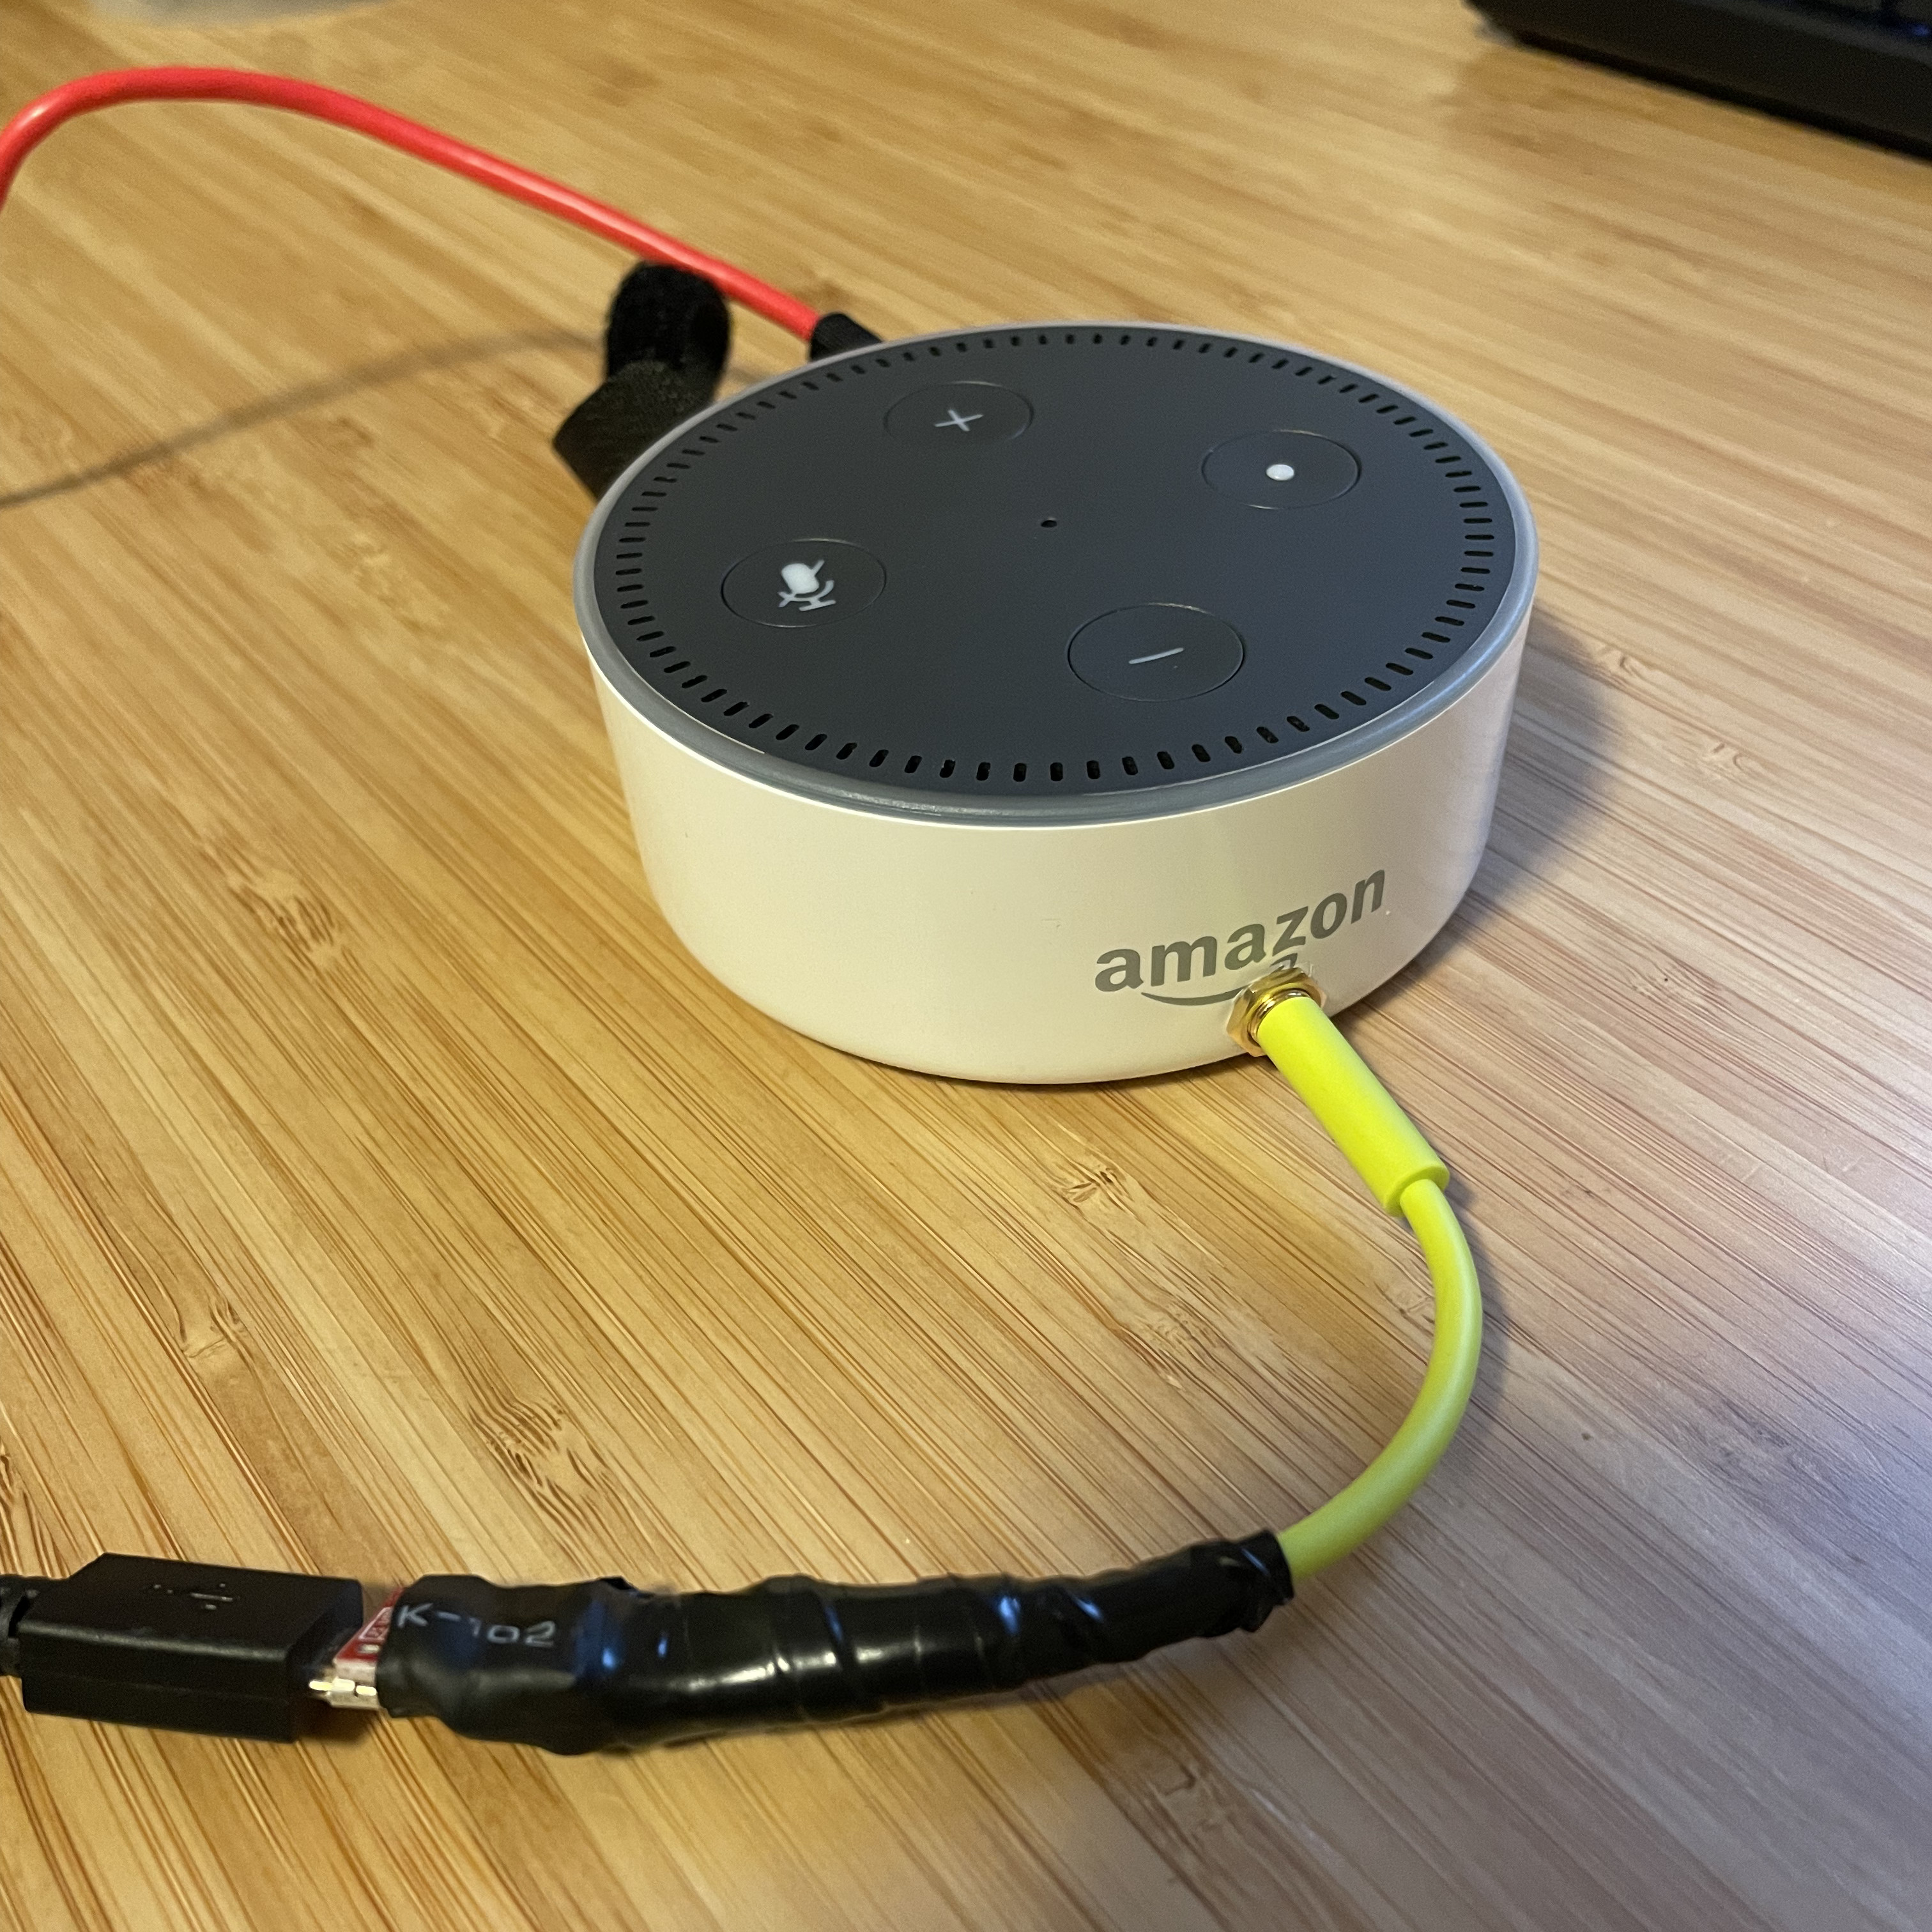
Since I am planning to use the boot UART quite a bit while reverse engineering the echo, it makes sense to add a connector to simplify getting access to the UART. I chose to use a 3.5mm TRS connector allow access to the UART even when the echo dot is reassembled. This will reduce the risk of damaging something by allow the echo to be re-assembled:
Next Steps
Now that we have found the boot UART, we have good tool start using for exploring the echo dot boot process, and manipulating it to boot our own kernel.

